How to make a Lino Cut Print
A step by step guide to making a Linocut print
Lino Printing is a Relief printmaking technique that involves carving a design into an artists grade lino block, which is then inked and pressed onto paper to create a print. This guide will walk you through the process from start to finish, whether you're a beginner or looking to refine your technique.
Materials Needed:
Linoleum Block: You can buy this from most art stores or online.
Pens / Pencils / Eraser
Linocut Tools: A set of gouges (U-shaped and V-shaped) for carving.
Ink: Water-based or oil-based block printing ink.
Roller (Brayer): For spreading the ink evenly on the block.
Good Quality Printmaking Paper and Scrap Paper / Newsprint for testing on.
Tracing Paper (Optional): For transferring your design.
Bench Hook or Non-Slip Mat: To keep the block steady while carving.
Baren or Spoon or Printing press: For pressing the paper onto the inked block.
Palette Knife
Driers (Optional): If you want your oil based or safe wash ink to dry more quickly
Glass or Perspex Sheet: A flat surface you can roll ink onto
Registration Tools.
Print drying: This can be anything from a string and some crocodile clips to a fancy shop bought hanging system.
Step 1: Design Your Image
Start by sketching your design on paper. Keep in mind that the final print will be a mirror image of your design, so reverse your image! Simple, bold designs with clear lines and shapes work best for lino cutting, especially for beginners. Remember you don’t need to make a perfect image first time so don’t be worry about making mistakes, experiment and have fun.
Step 2: Transfer the Design to the Linoleum Block
There are multiple ways to put your design onto lino. Here are two options of many for you to try. You can draw the design straight onto the lino. Doing this will make your image come out as a mirror image so you will need to reverse the image before drawing it on. A second approach would be to draw your design onto tracing paper and put graphite paper or transfer paper between the tracing paper and lino (put the transfer / graphite side facing down towards the lino). Now draw over the design again. This will push the design onto the lino. This will create a reversed image so make sure you design it in reverse first.
If you forget to reverse your image, don’t fret. It may work out that it looks great in reverse. An image such as a flower wont be ruined being in reverse. However if you forget to reverse the design for designs including text for example this will mean you need to start the process again.
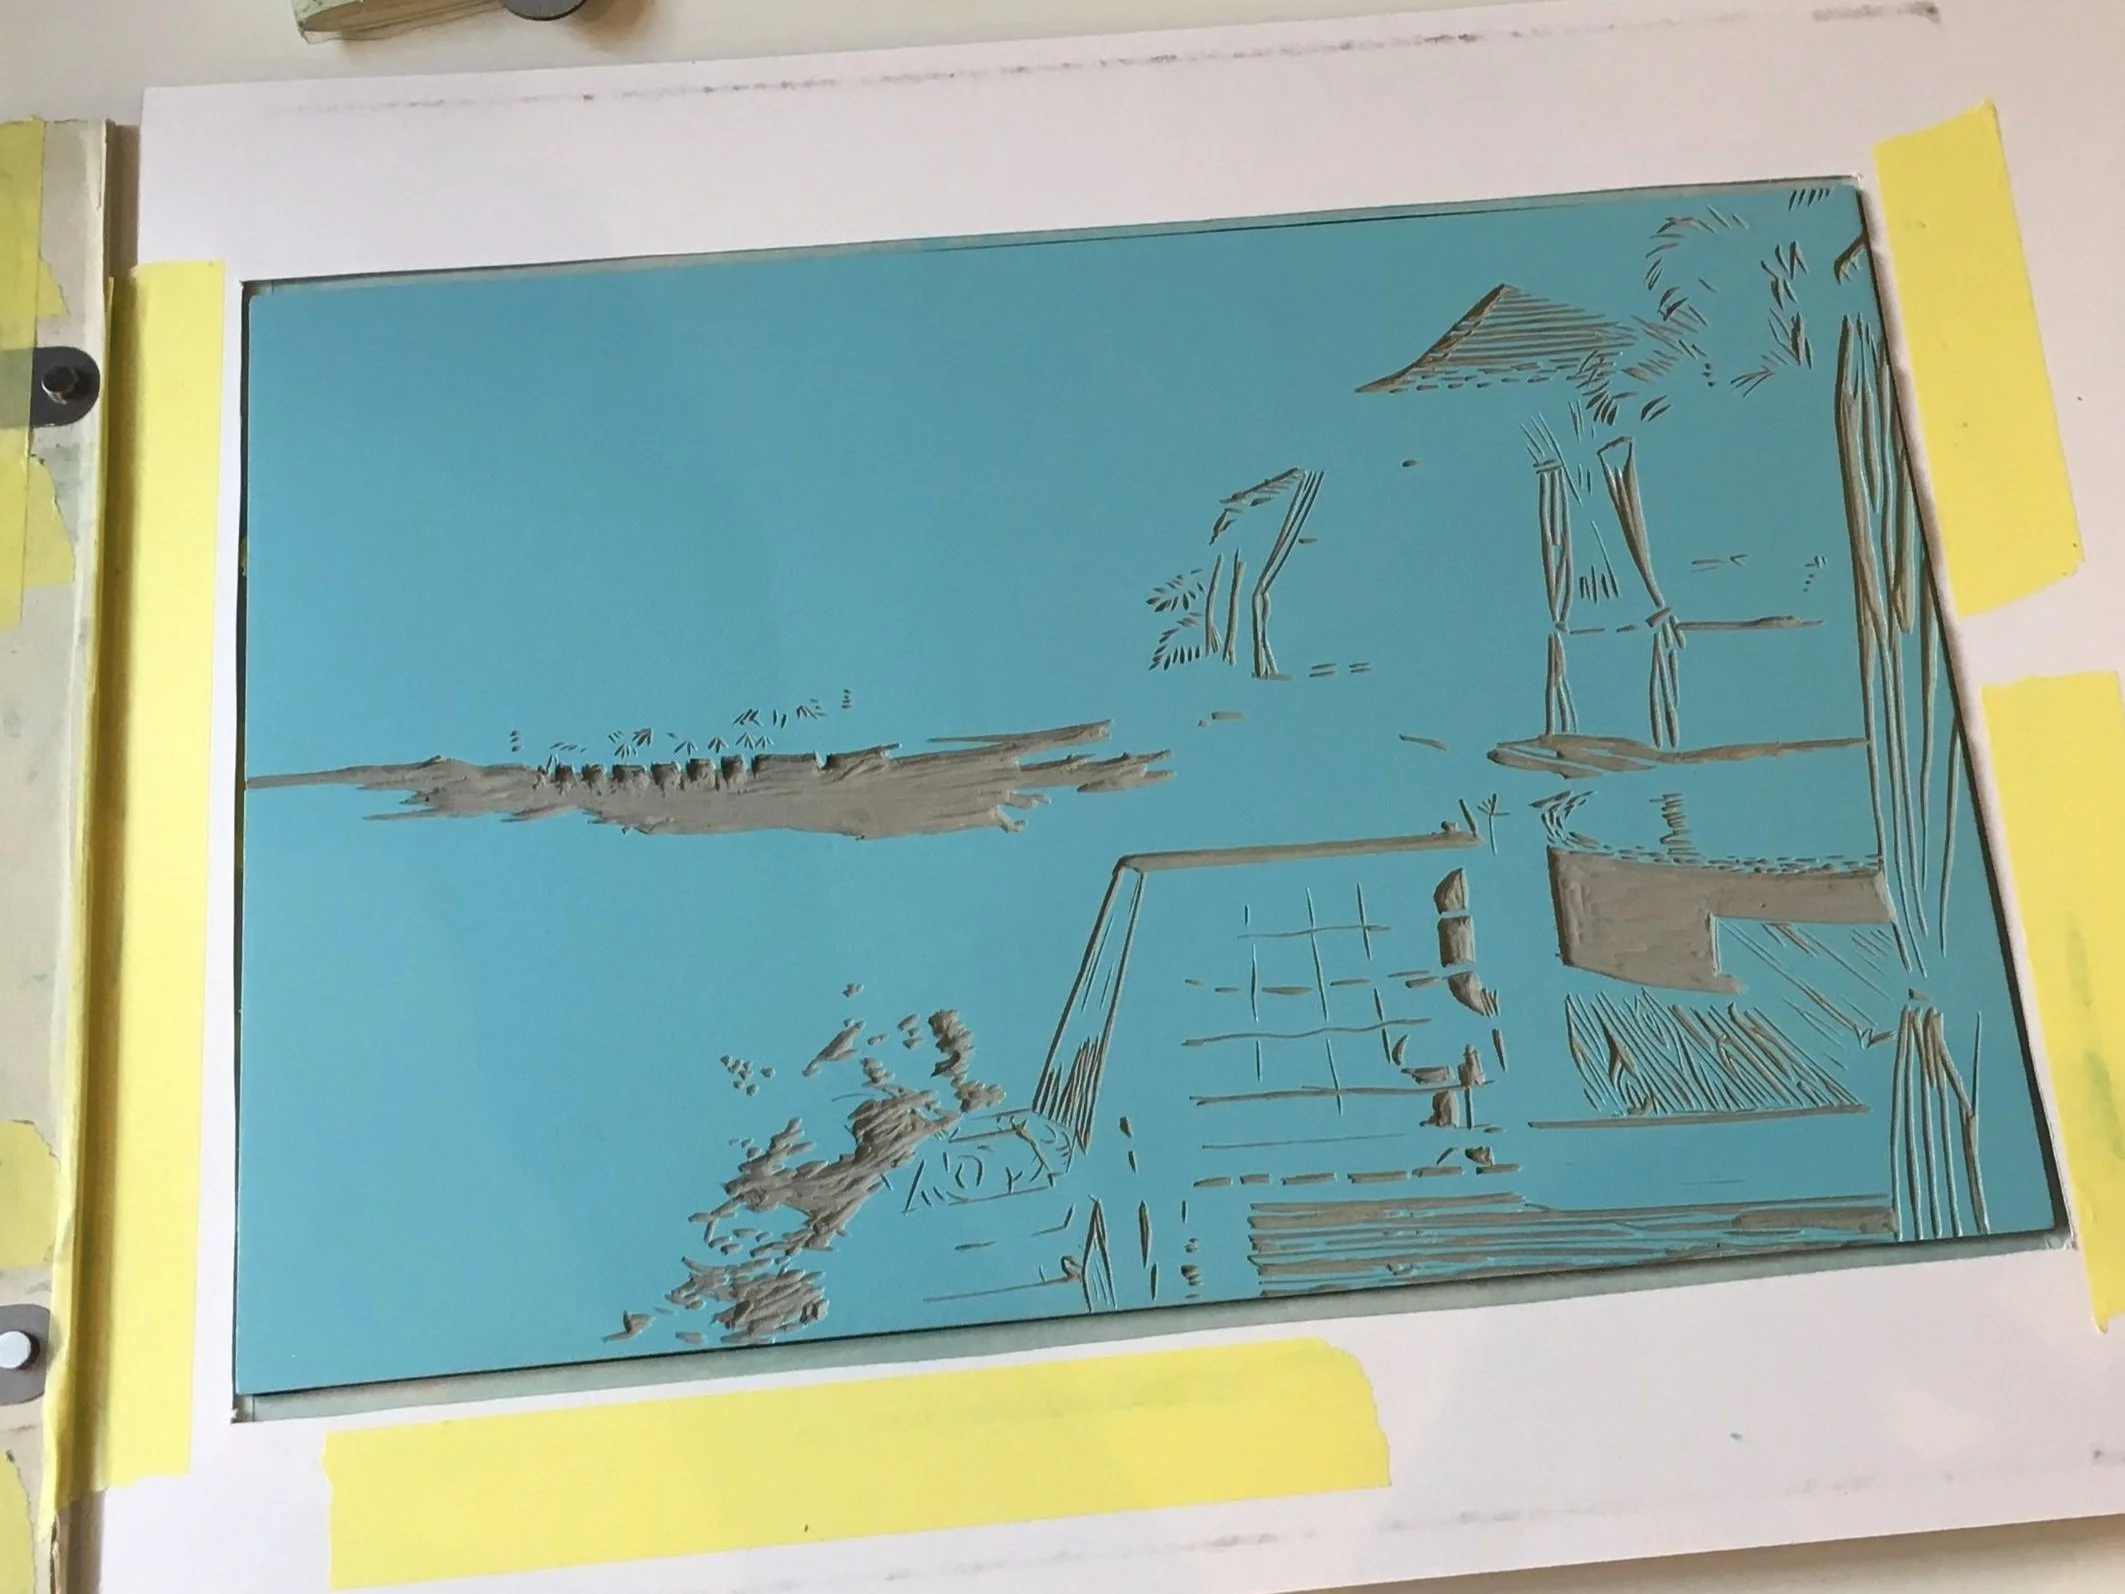
Step 3: Carve the Linoleum Block
Set up a clean, well-lit workspace. Secure your linoleum block on a bench hook or non-slip mat to prevent it from moving while you carve. Make sure you have all your tools within easy reach. Start carving along the lines of your design. Experiment with different shapes of gouges and the marks they make, how deeply they cut etc. Always carve away from your body to avoid injury. Tools can be extremely sharp and often beginners learn the hard way to not leave a stray finger in the path of a cut. Slipping, especially in the beginning is extremely common. Take your time and make shallow cuts to avoid cutting too deep, which can damage the block. You want to avoid cutting all the way to the bottom so do some practice cuts first on a spare piece of lino. Each tool cerates different resistance and can cut too deeply or slip more or less easily so practice, practice, practice. Once you have finished carving, remove any loose pieces of linoleum. I like to use a brush or a hand-held vacuum to pick loose pieces out of the lino.

Step 4: Ink the Block
Clean your area of lino scraps and dust as you will want a clean area for printing. Dust, hair and stray lino piece can quickly create havock once they find their way into your ink. You will want to make a test print on a scrap paper. This will help you identify any areas that need further carving or adjustment. Spread a small amount of ink on a flat surface (a glass or acrylic sheet works well). Use the roller (brayer) to evenly spread the ink until it makes a thin, even layer. Beginners often use too much ink. A good way to know the correct amount is to roll out the ink thinly. There shouldn’t be a tacky texture when rolling. You can add or remove excess ink with a palette knife. Roll the ink onto the carved linoleum block, ensuring all raised areas are covered. If you need your ink to dry more quickly (if you are in a rush for a deadline or if you are doing multiple layer linos and wish to reduce the days it ill take for one layer to dry). I add one drop of driers to my ink. This is only for oil based or safe wash oil inks. Fully water based inks should dry quickly enough.
Step 5: Print Your Image
Place the inked block on a clean surface. Carefully lay your paper on top of the block. If you are doing an image with more than one block, you will need registration tools such as the turns burton method to align the image in the same place each time. If you are a beginner I advise you skip this step and use just one block for your image. Use a baren or the back of a spoon to apply even pressure across the entire surface of the paper. Make sure to cover all areas to transfer the ink evenly. Alternatively use a printing press. Peel up one edge to see how the transfer is going. Lift the paper carefully to reveal your print. I always find it takes a while to get the lino working properly. A smooth image begins happening on the third or fourth try. This is why I like to use scrap paper or newsprint for the first three prints which I discard. This is so I do not waste expensive printmaking paper.
Step 6: Allow the Print to Dry
Place the print on a drying rack or clean surface to dry. Depending on the type of ink used and if you have added driers, drying time can vary from a few hours to a day or more.

Step 7: Clean Up
Clean your tools and workspace immediately after printing. Water-based ink can be cleaned with soap and water, while oil-based ink requires mineral spirits or a specialized cleaner. Some inks such as Caligo safe wash are a sort of half way ink between oil and water. For this I recommend putting lots of washing up liquid on anything with ink on, moving it around to dissolve the ink and then washing off with water. Proper maintenance of your tools will extend their life and ensure better results in future projects. If you can hang your rollers up this will extend their life and stop them from sitting on a table and creating a imprint in the roller which will affect future prints. Depending on your ink type you will have paint water, or rags covered in mineral spirits etc. Please try and dispose of them in a way which is safe for you and the environment. Mineral spirit rags can cause a fire risk and paint water can block sinks or work its way into water systems which can be harmful for the environment.

“Hummingbird House” - Made using the reduction linocut technique. Using one piece of lino and cutting away more and more lino each time a new colour is printed. If you are interested in buying an original print, there are some available in my online art shop. Just click the link below.
Now you know how to make a single colour print you may wish to experiment more with different linocut styles introduce multiple colours or learn some other methods to improve your technique. Below is a linocut print I made using a technique known as a ‘reduction linocut’. You can advance your knowledge by reading more about that in my blog “Linocut Printing Techniques” or click here.